
저번에는 프론트엔드인 React에서 웹소켓 설정을 작성했었는데, 이번엔 백엔드에서 해볼 예정이다.
백엔드에도 라이브러리가 다 되어있기에 어렵지는 않다.
모듈 생성
nest g mo events

게이트웨이 생성
nest g ga events
우선 간단하게 웹소켓을 사용할 게이트웨이와 모듈을 생성해준다.(모듈 따로 안만들고 App 모듈에 다 연결해도 된다.)
우선 사용할 라이브러리를 받아주고,
npm i --save @nestjs/websockets @nestjs/platform-socket.io
npm i --save-dev @types/socket.io

or

yarn add @nestjs/websockets @nestjs/platform-socket.io
yarn add @types/socket.io
게이트웨이에 들어간다.
처음에 생성할 경우,
import { SubscribeMessage, WebSocketGateway } from '@nestjs/websockets';

@WebSocketGateway()
export class EventGateway {
  @SubscribeMessage('message')
  handleMessage(client: any, payload: any): string {
    return 'Hello world!';
  }
}
가장 기본적으로 이렇게 만들어진다.
웹소켓에 접속 후 message 이벤트로 전송하게 되면 handleMessage로 받아지는 코드이다.
전체적인 코드는 아래와 같고
import { Logger } from "@nestjs/common";
import {
  MessageBody,
  OnGatewayConnection,
  OnGatewayDisconnect,
  OnGatewayInit,
  SubscribeMessage,
  WebSocketGateway,
  WebSocketServer,
} from "@nestjs/websockets";
import { Server, Socket } from "socket.io";

// 게이트웨이 설정
@WebSocketGateway({
  namespace: "api/chatting",
  cors: { origin: "*" },
})
export class ChatGateway implements OnGatewayInit, OnGatewayConnection, OnGatewayDisconnect {
  constructor(private readonly chattingService: ChattingService) {}

  @WebSocketServer() server: Server;
  private logger: Logger = new Logger("EventsGateway");

  @SubscribeMessage("events")
  async handleEvent(@MessageBody() data: Chatting): Promise<void> {
    this.server.emit("events", result);
  }

  afterInit(server: Server) {
    this.logger.log("웹소켓 서버 초기화 ✅");
  }

  handleDisconnect(client: Socket) {
    this.logger.log(`Client Disconnected : ${client.id}`);
  }

  handleConnection(client: Socket, ...args: any[]) {
    this.logger.log(`Client Connected : ${client.id}`);
  }
}
나눠서 설명을 하면
웹 소켓 게이트웨이의 설정이다.
위와 같이 @WebSocketGateway의 첫번째 같이 넣지 않으면 서버와 같은 포트로 연결되고, namespace가 없으면 백엔드의 기본 url로 연결 시 연결하고 된다.
아래처럼 포트번호를 적어서 웹소켓용 포트를 따로 지정해줄 수도 있다.
@WebSocketGateway({
  namespace: "api/chatting",
  cors: { origin: "*" },
})
export class ChatGateway implements OnGatewayInit, OnGatewayConnection, OnGatewayDisconnect {

}

or

//
@WebSocketGateway(8000,{
  namespace: "api/chatting",
  cors: { origin: "*" },
})
export class ChatGateway implements OnGatewayInit, OnGatewayConnection, OnGatewayDisconnect {

}
아래의 코드는 웹소켓에 연결에 클라이언트가 연결되었을 경우와 연결 끊겼을때, handleConnection 및 handleDisconnect 에서 알수있다.
@WebSocketGateway({
  namespace: "api/chatting",
  cors: { origin: "*" },
})
export class ChatGateway implements OnGatewayInit, OnGatewayConnection, OnGatewayDisconnect {
  constructor(private readonly chattingService: ChattingService) {}

  @WebSocketServer() server: Server;
  private logger: Logger = new Logger("EventsGateway");

  afterInit(server: Server) {
    this.logger.log("웹소켓 서버 초기화 ✅");
  }

  handleDisconnect(client: Socket) {
    this.logger.log(`Client Disconnected : ${client.id}`);
  }

  handleConnection(client: Socket, ...args: any[]) {
    this.logger.log(`Client Connected : ${client.id}`);
  }
}
이벤트를 통하여 전송하게 되면 @SubscribeMessage(이벤트명)으로 전송하게 되고,
server.emit를 통하여 같은 이벤트에 연결된 클라이언트에 전송이 가능하다.
 @SubscribeMessage("events")
  async handleEvent(@MessageBody() data: Chatting): Promise<void> {
    const result = await this.chattingService.postChatting(data);
    this.server.emit("events", result);
    // return data;
  }
테스트는 직접 프론트엔드를 만들어서 테스트를 해도 되지만, postman에 웹소켓을 테스트할 수 있는 기능이 있다.
postman에 new로 새로 만들면 websocket Request라는 항목이 있다.
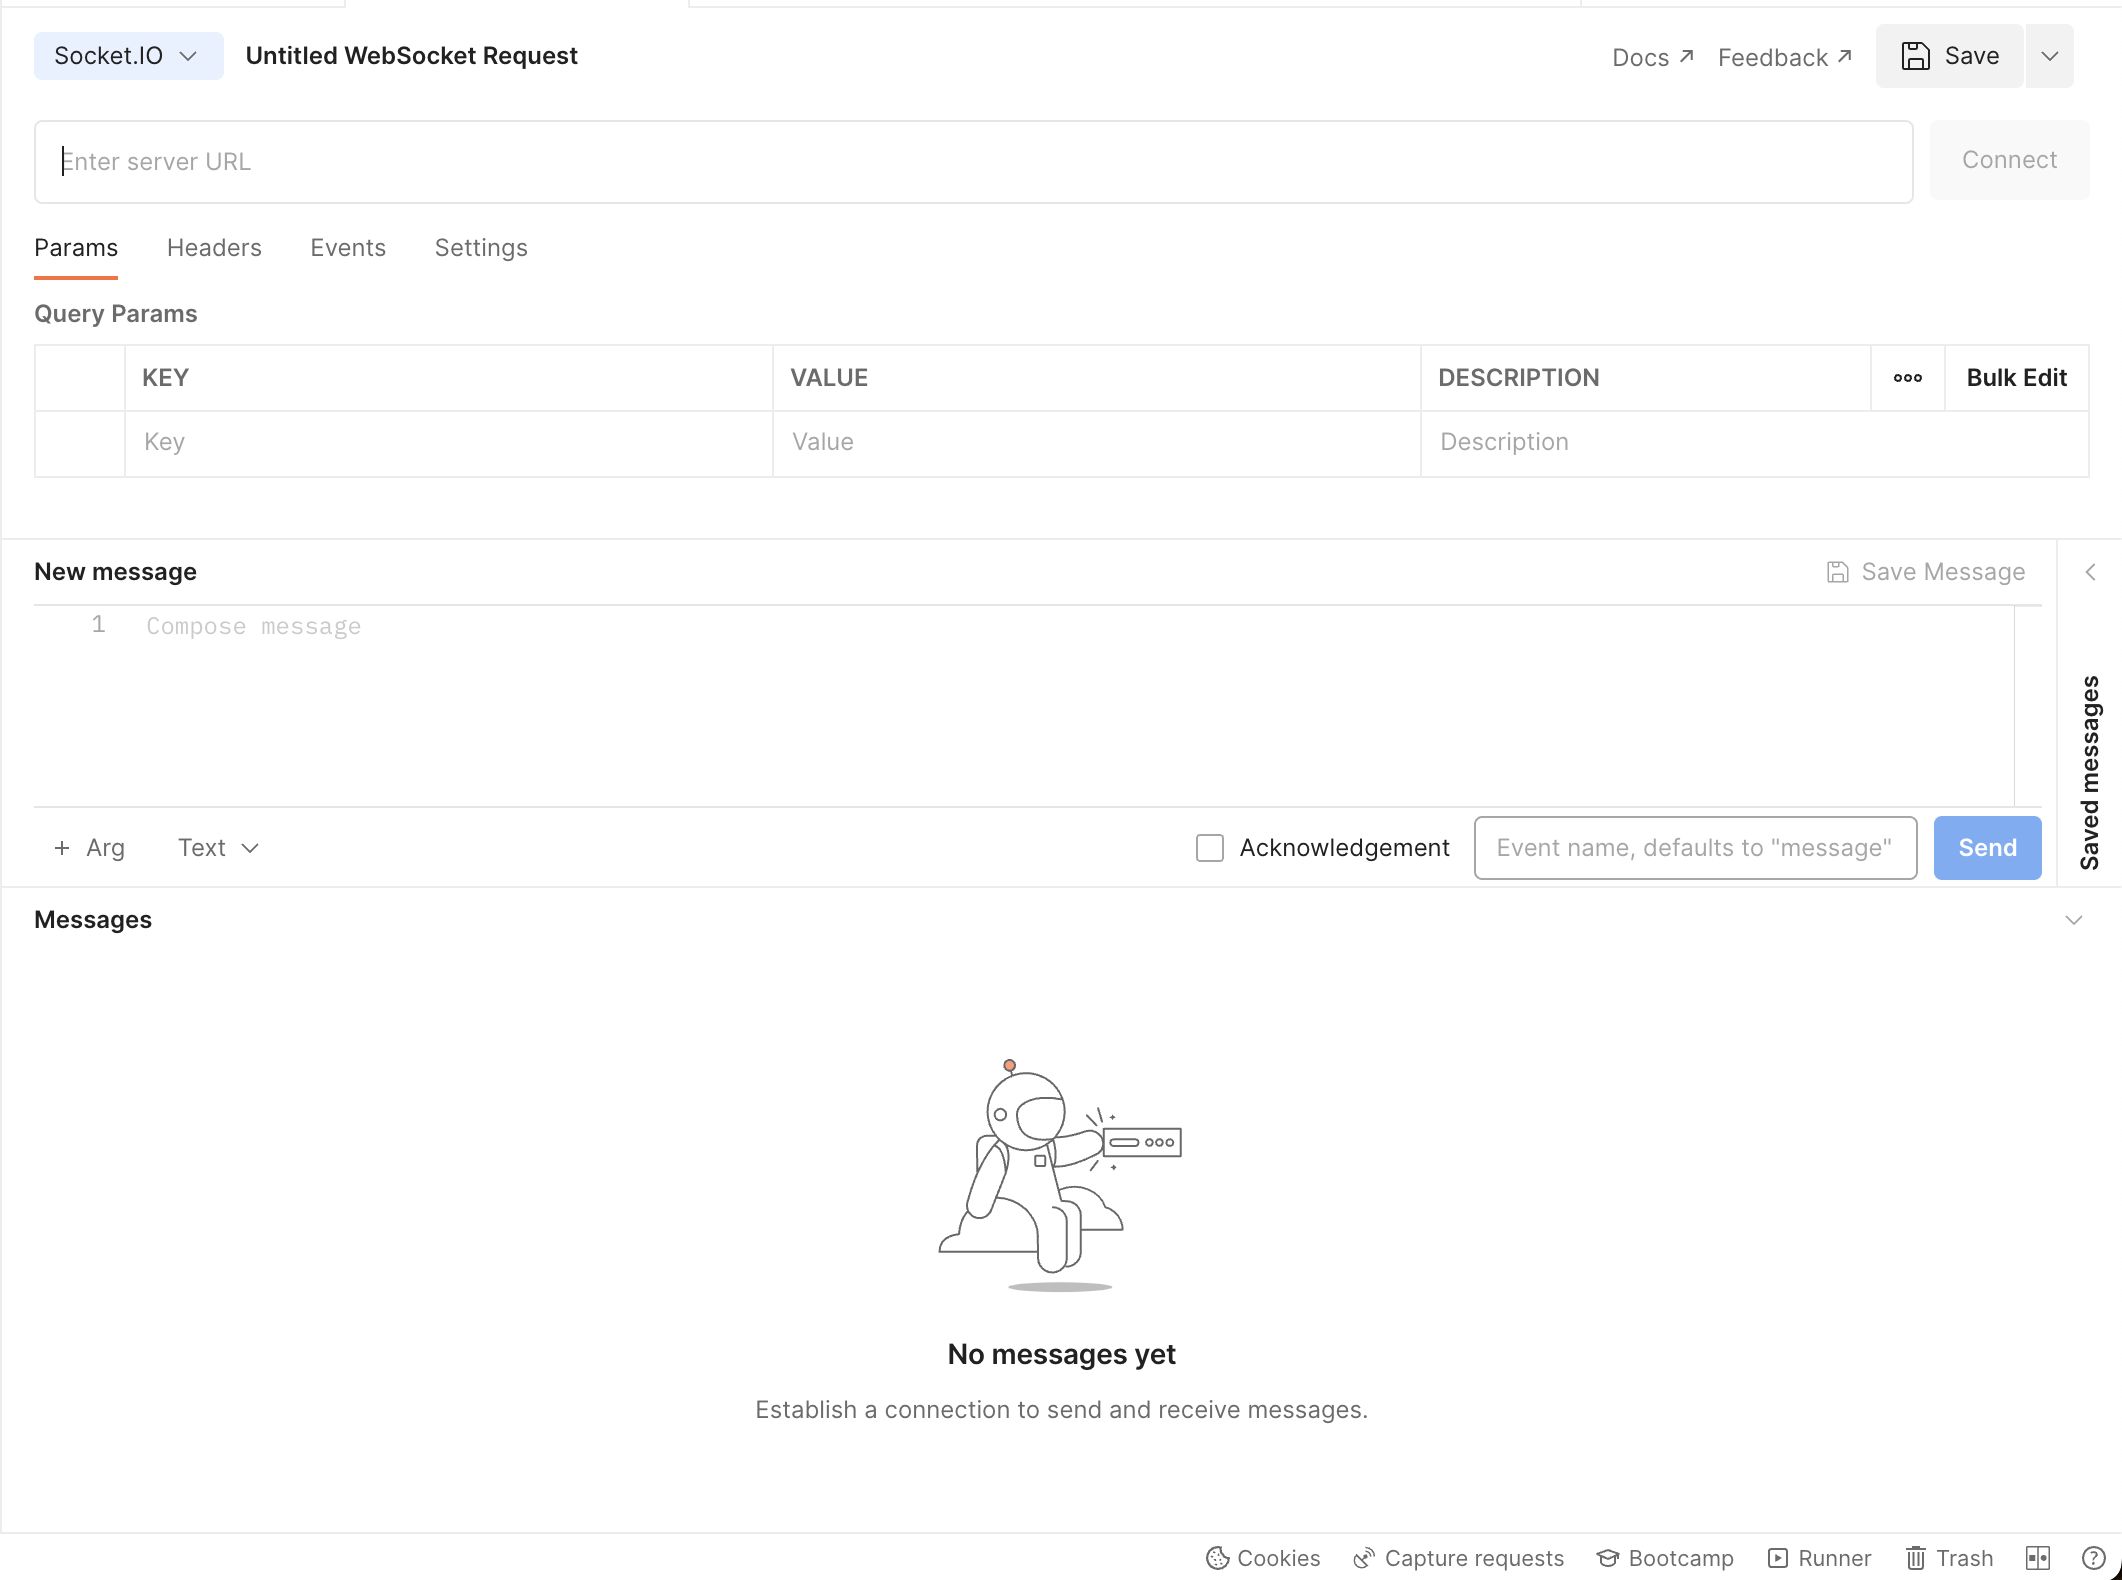
들어가서 연결할 url을 입력후 connect를 누르면 연결상태를 확인할 수 있다. events로 들어가서 이벤트 명을 입력 후 메세지를 작성하고 send를 보내면 나오는 결과값도 테스트가 가능하다.